Accueil > Skills > Buying a domain on Namecheap and pointing it to Heroku
Buying a domain on Namecheap and pointing it to Heroku
This tutorial shows how to buy a domain on Namecheap and point a subdomain to a Heroku application. Bonus: configure an email redirection.
Summary
In this tutorial, we will walk through the necessary steps to buy a domain on Namecheap and configure the www subdomain to point to an existingHeroku application.
Buying the domain
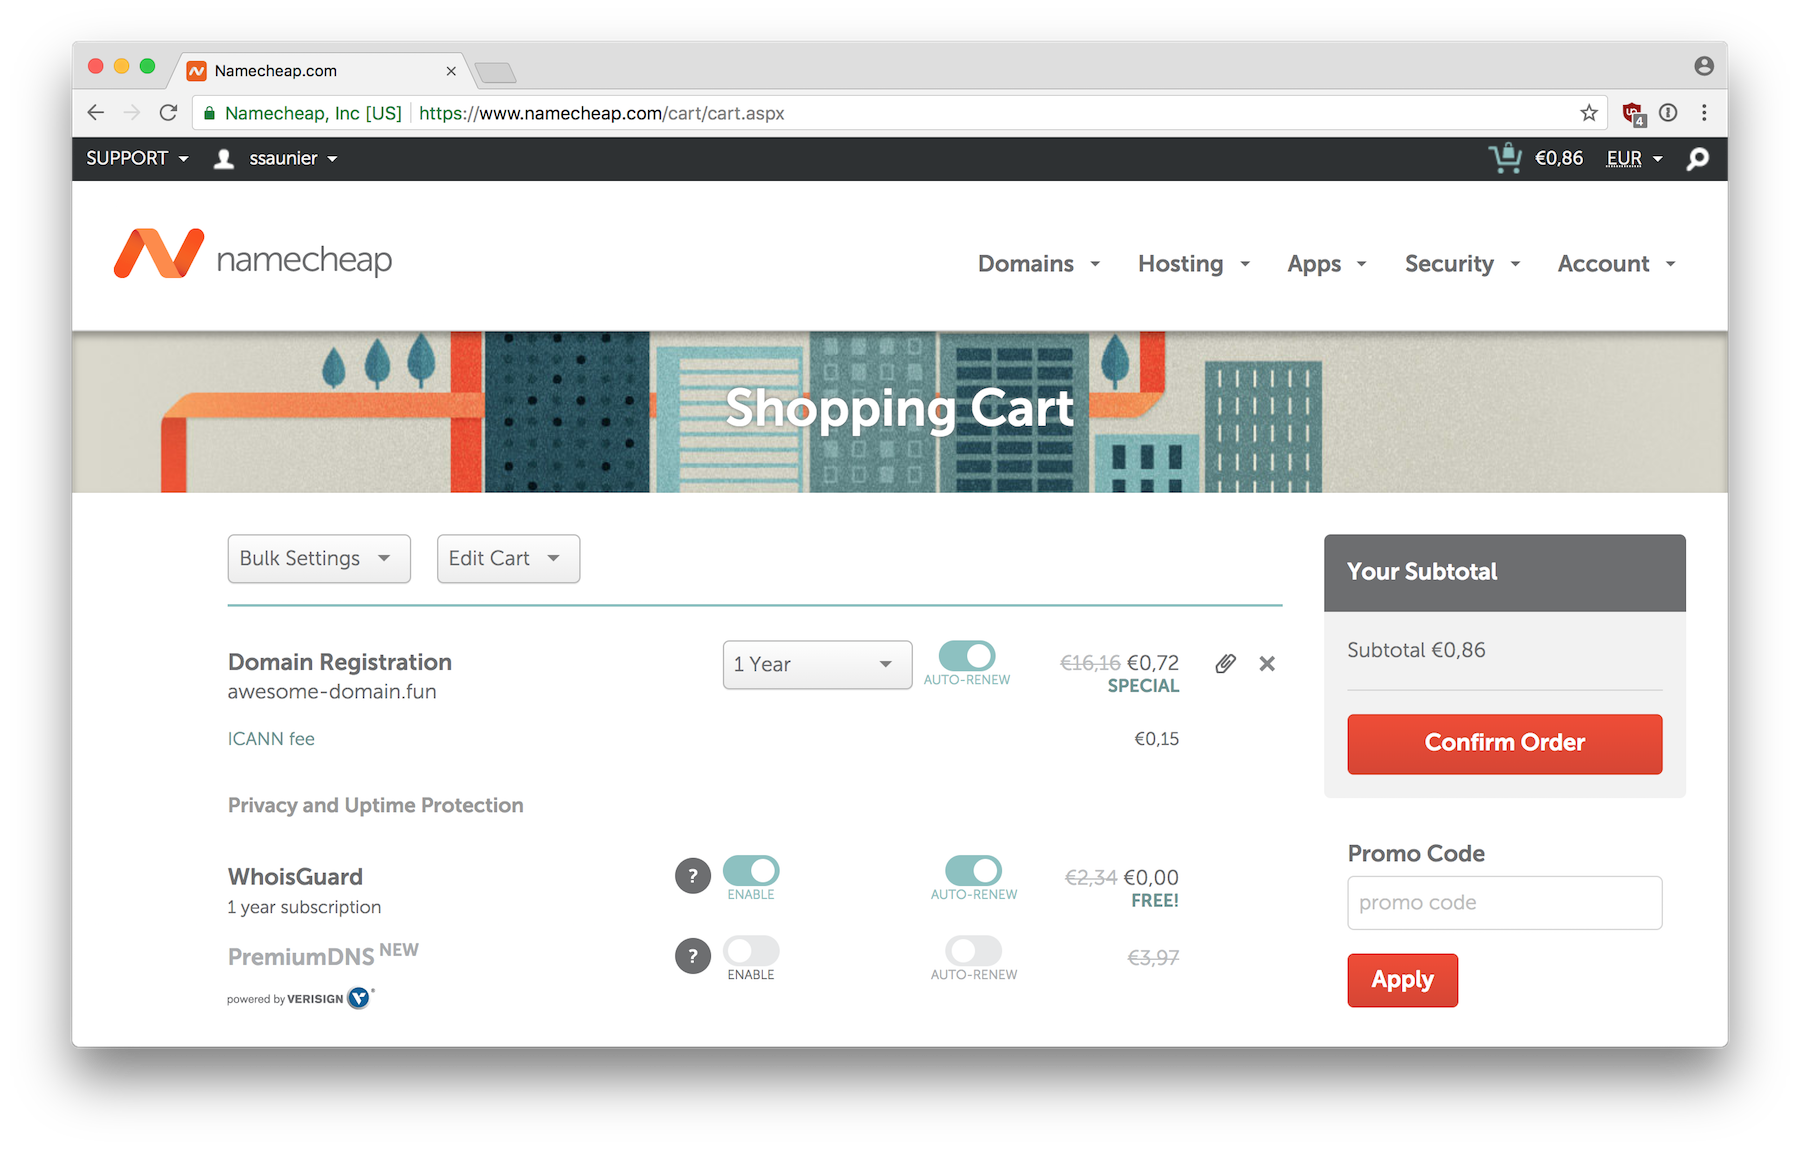
Sign up to Namecheap with a username, email and password. Then search for an available domain. A domain is a name + a TLD, no need to type www (that would be a sub-domain).
I am buying the domain awesome-domain.fun. You can ignore all the upsell items under "Improve Your Site" and click on "Confirm Order":
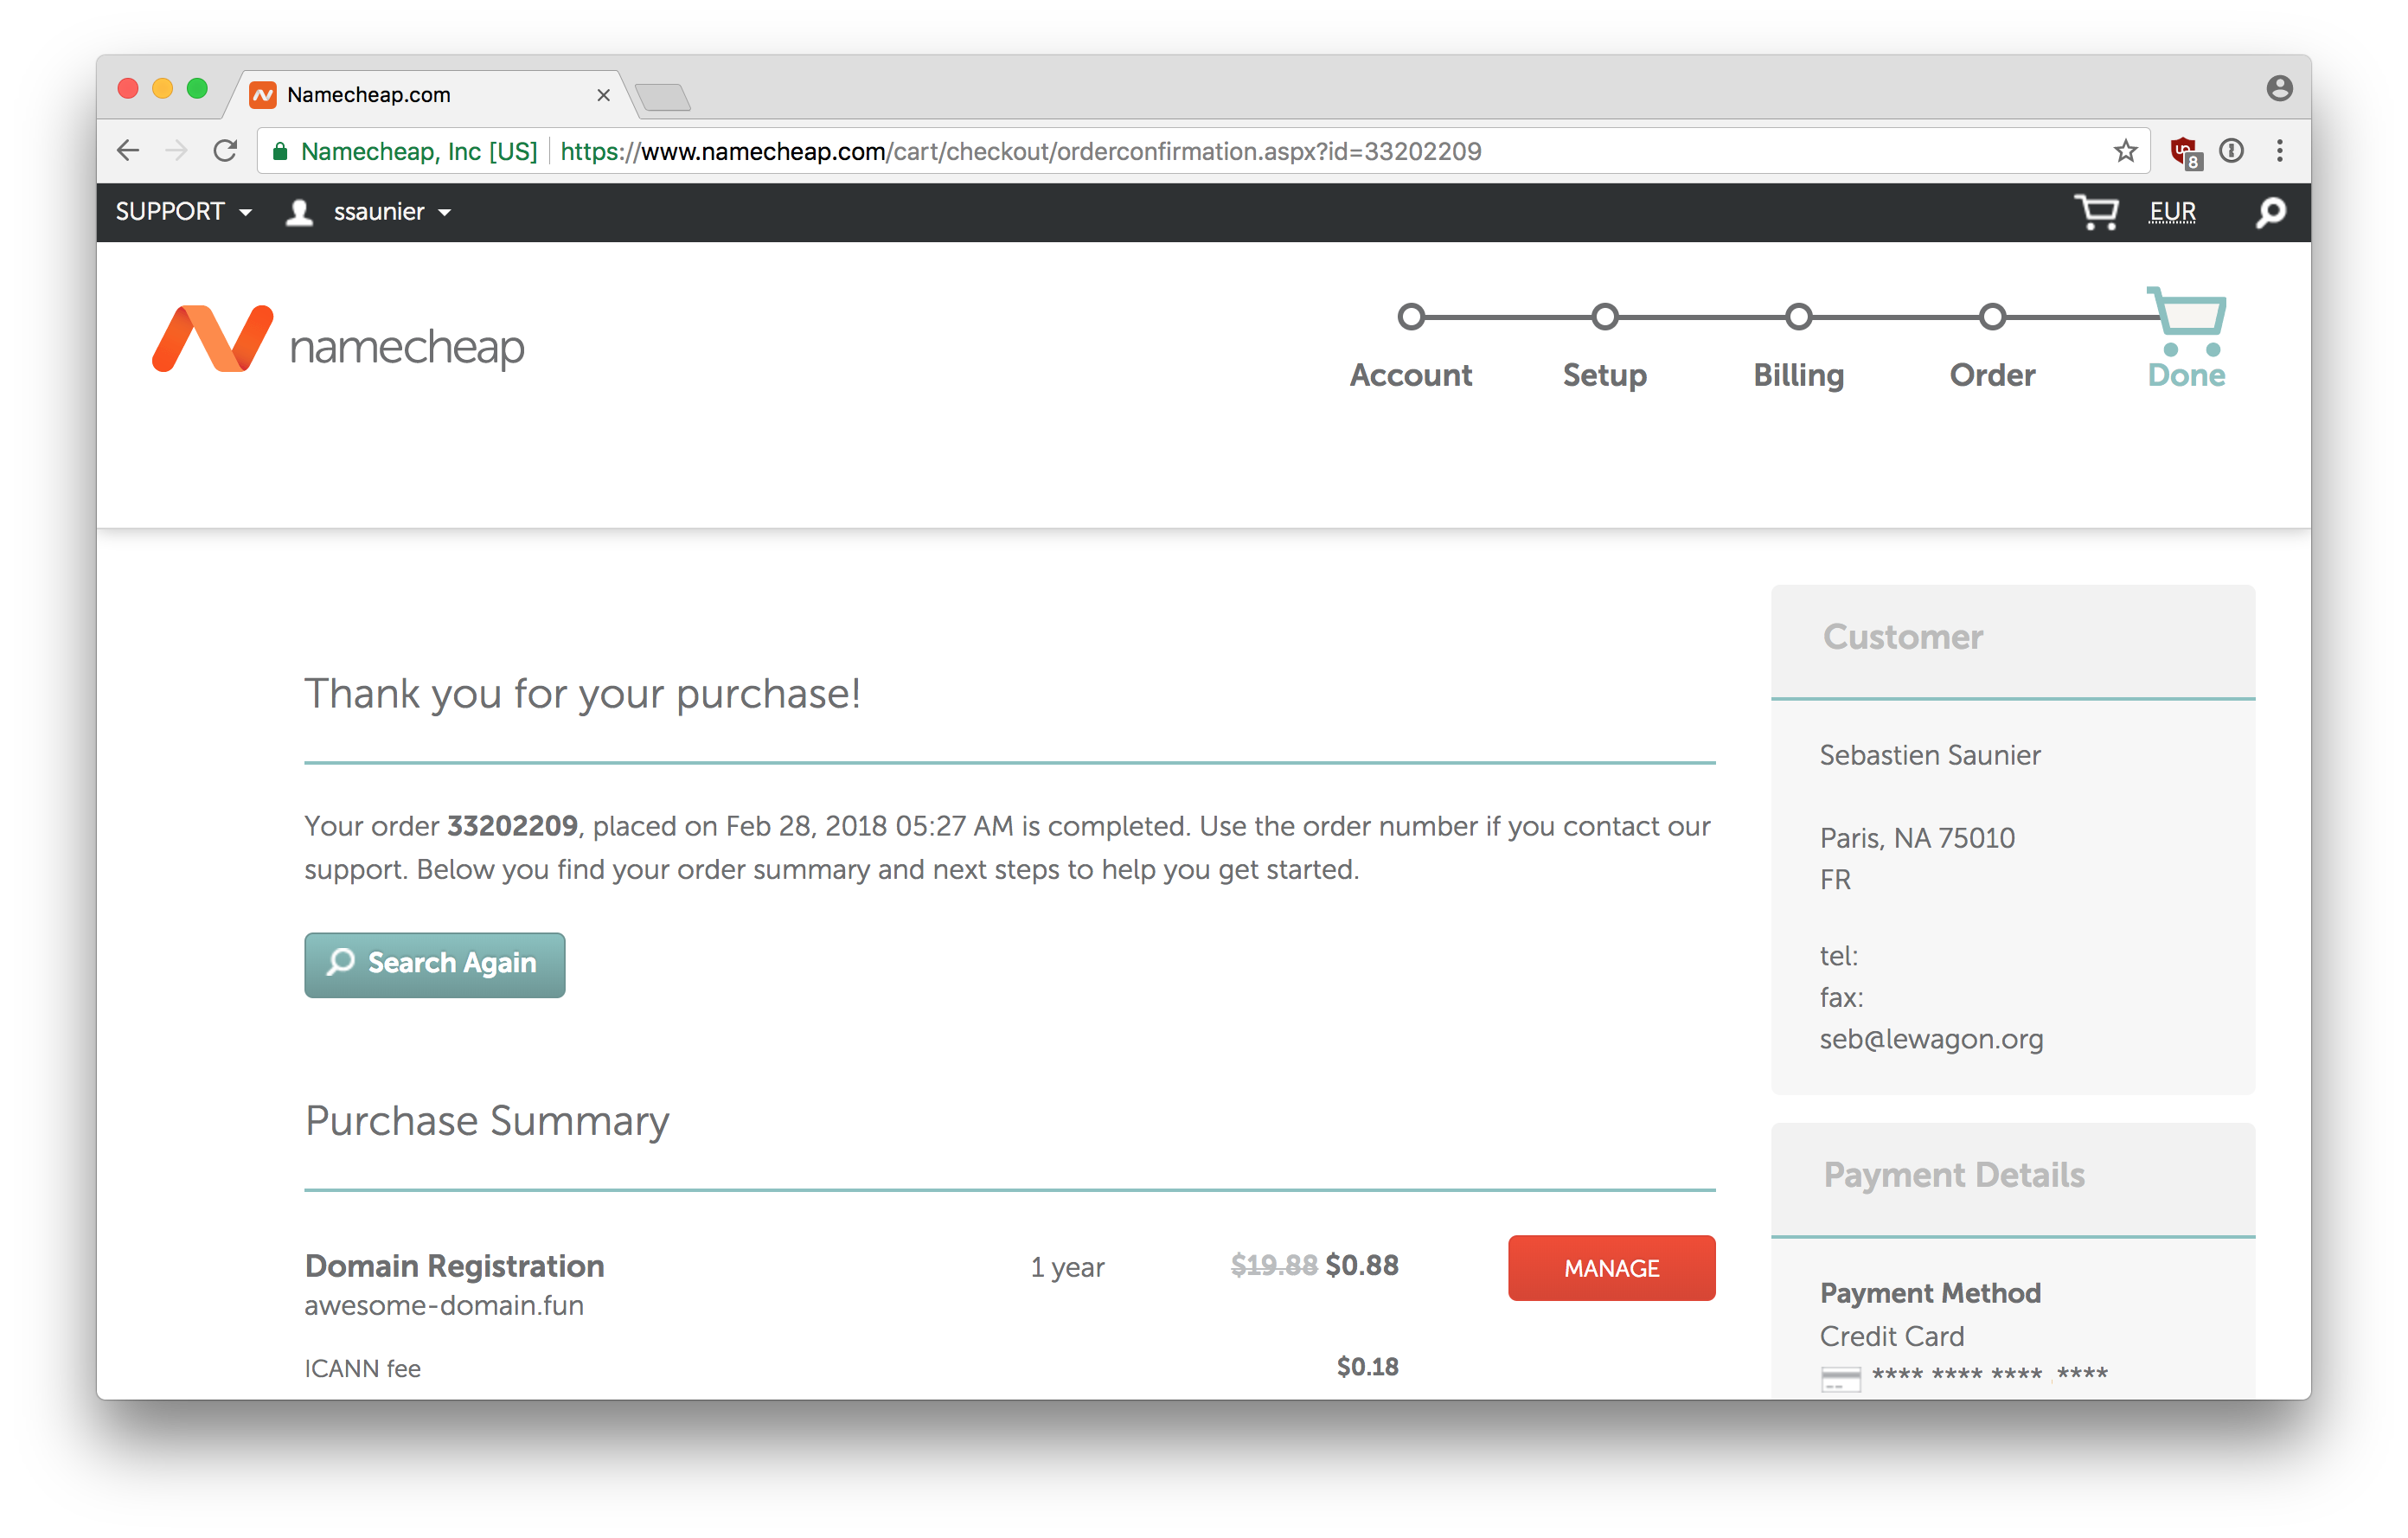
You will have a few screens where you need to specify your identity (and your company's if you're buying it on behalf of your venture) until you get to the Payment page. You can choose between a credit card and Paypal. You are buying a domain for a specific amount of time (usually one year), which means that after a year you will have to pay again if you want to keep it. In my scenario, I am paying $0.88 now but if I want to renew it I will have to pay $19.88 next year.
You can now click on "Manage" to go to the Domain List admin section.
Pointing the domain to Heroku
Before going further, you need a verified Heroku account which involves adding your credit card to Heroku under the Account > Billing tab. Don't worry, you won't be charged anything for adding a custom domain.
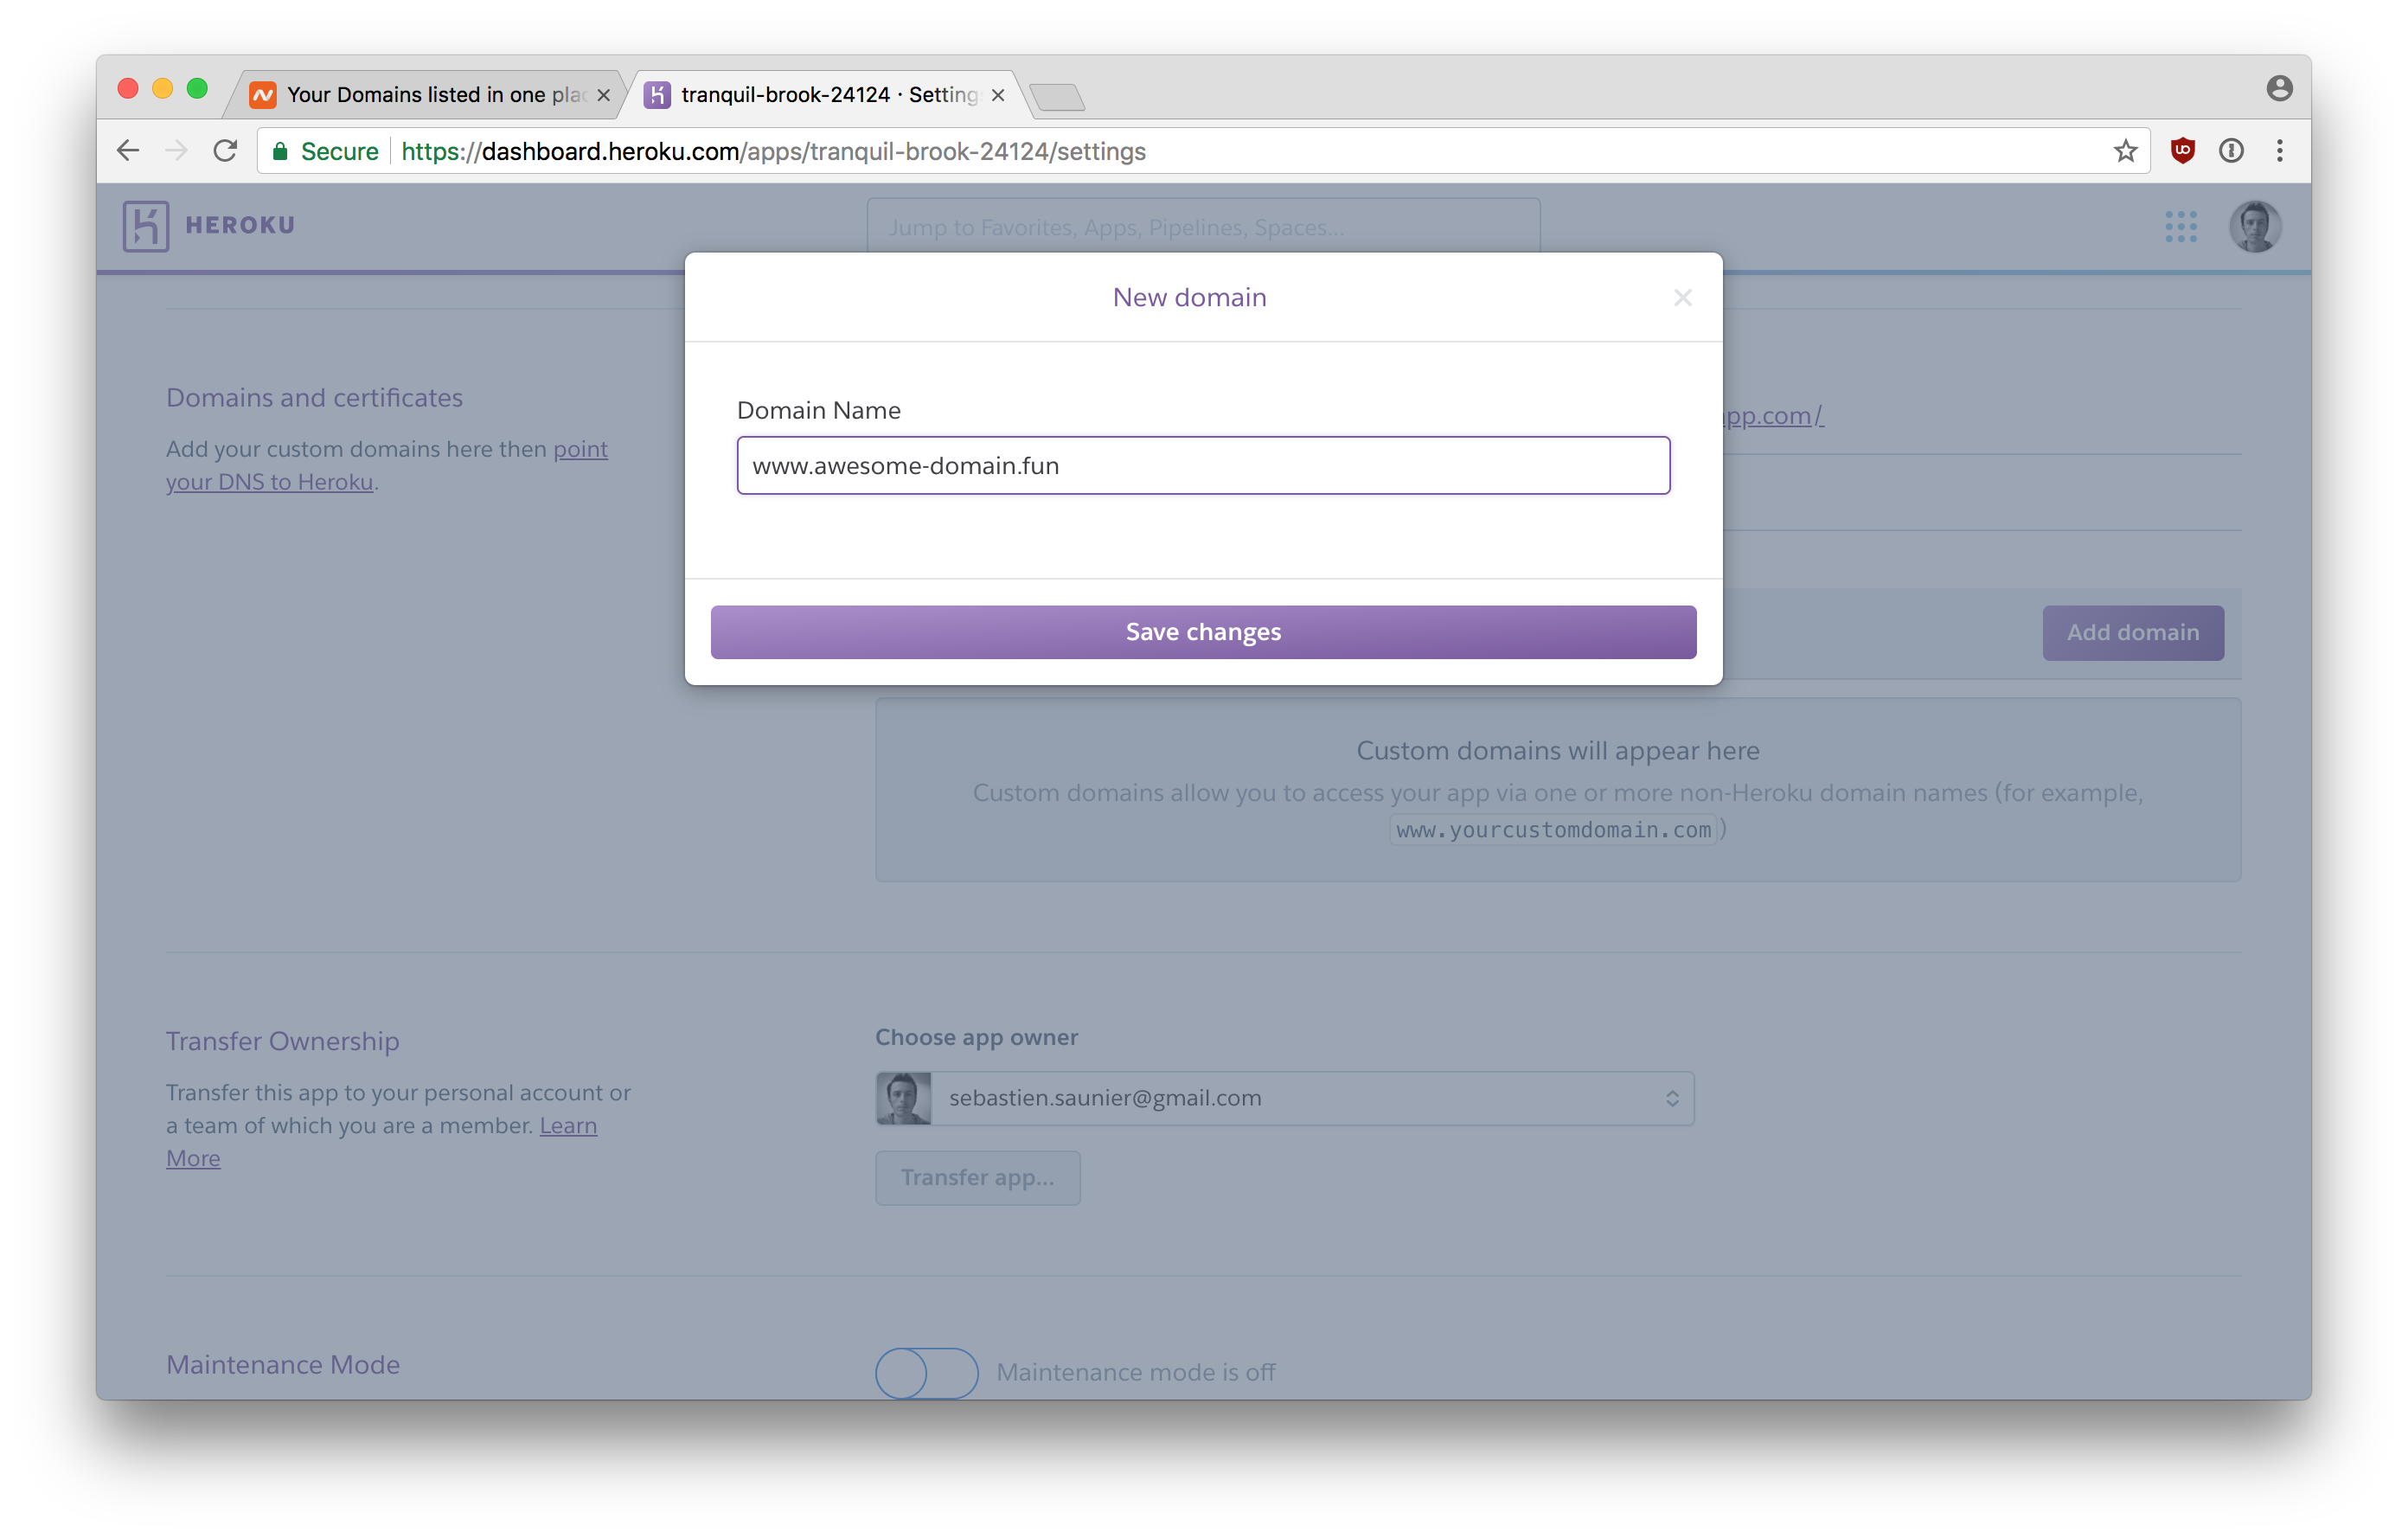
The goal is now to point the www subdomain to my previously created Heroku application. This is a 2-step process.
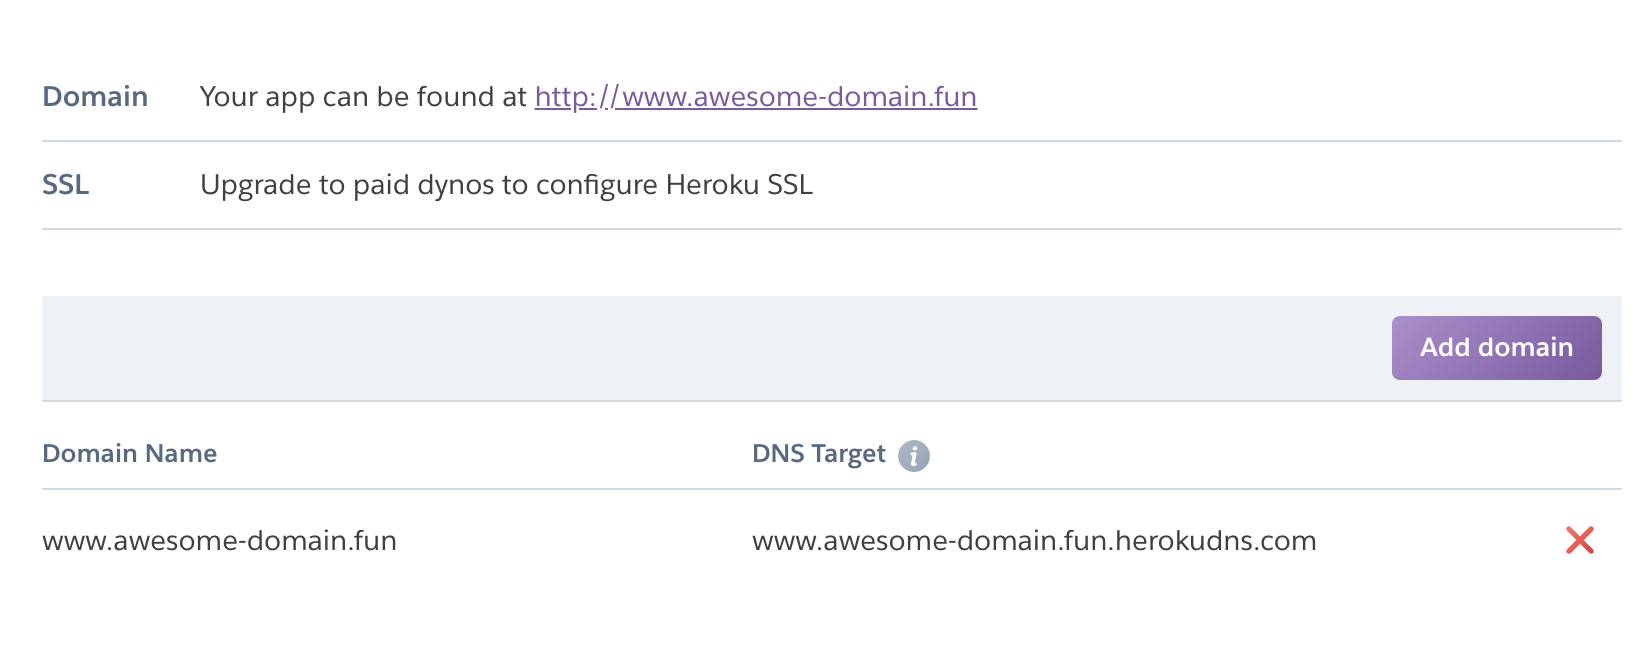
First connect to the Heroku dashboard, select the heroku application and go to the "Settings" tab. Scroll down until you reach the Domain and certificates section. Click on the purple "Add domain" button and type the domain name with its subdomainyou want to use. Here I am going to type www.awesome-domain.fun.
Do not use a domain without a subdomain (called bare, naked, root or apex), as it brings limitations. Always use a subdomain.
You should now get the CNAME on Heroku, it should look like yourdomain.herokudns.com. Copy it, we will need it in Namecheap.
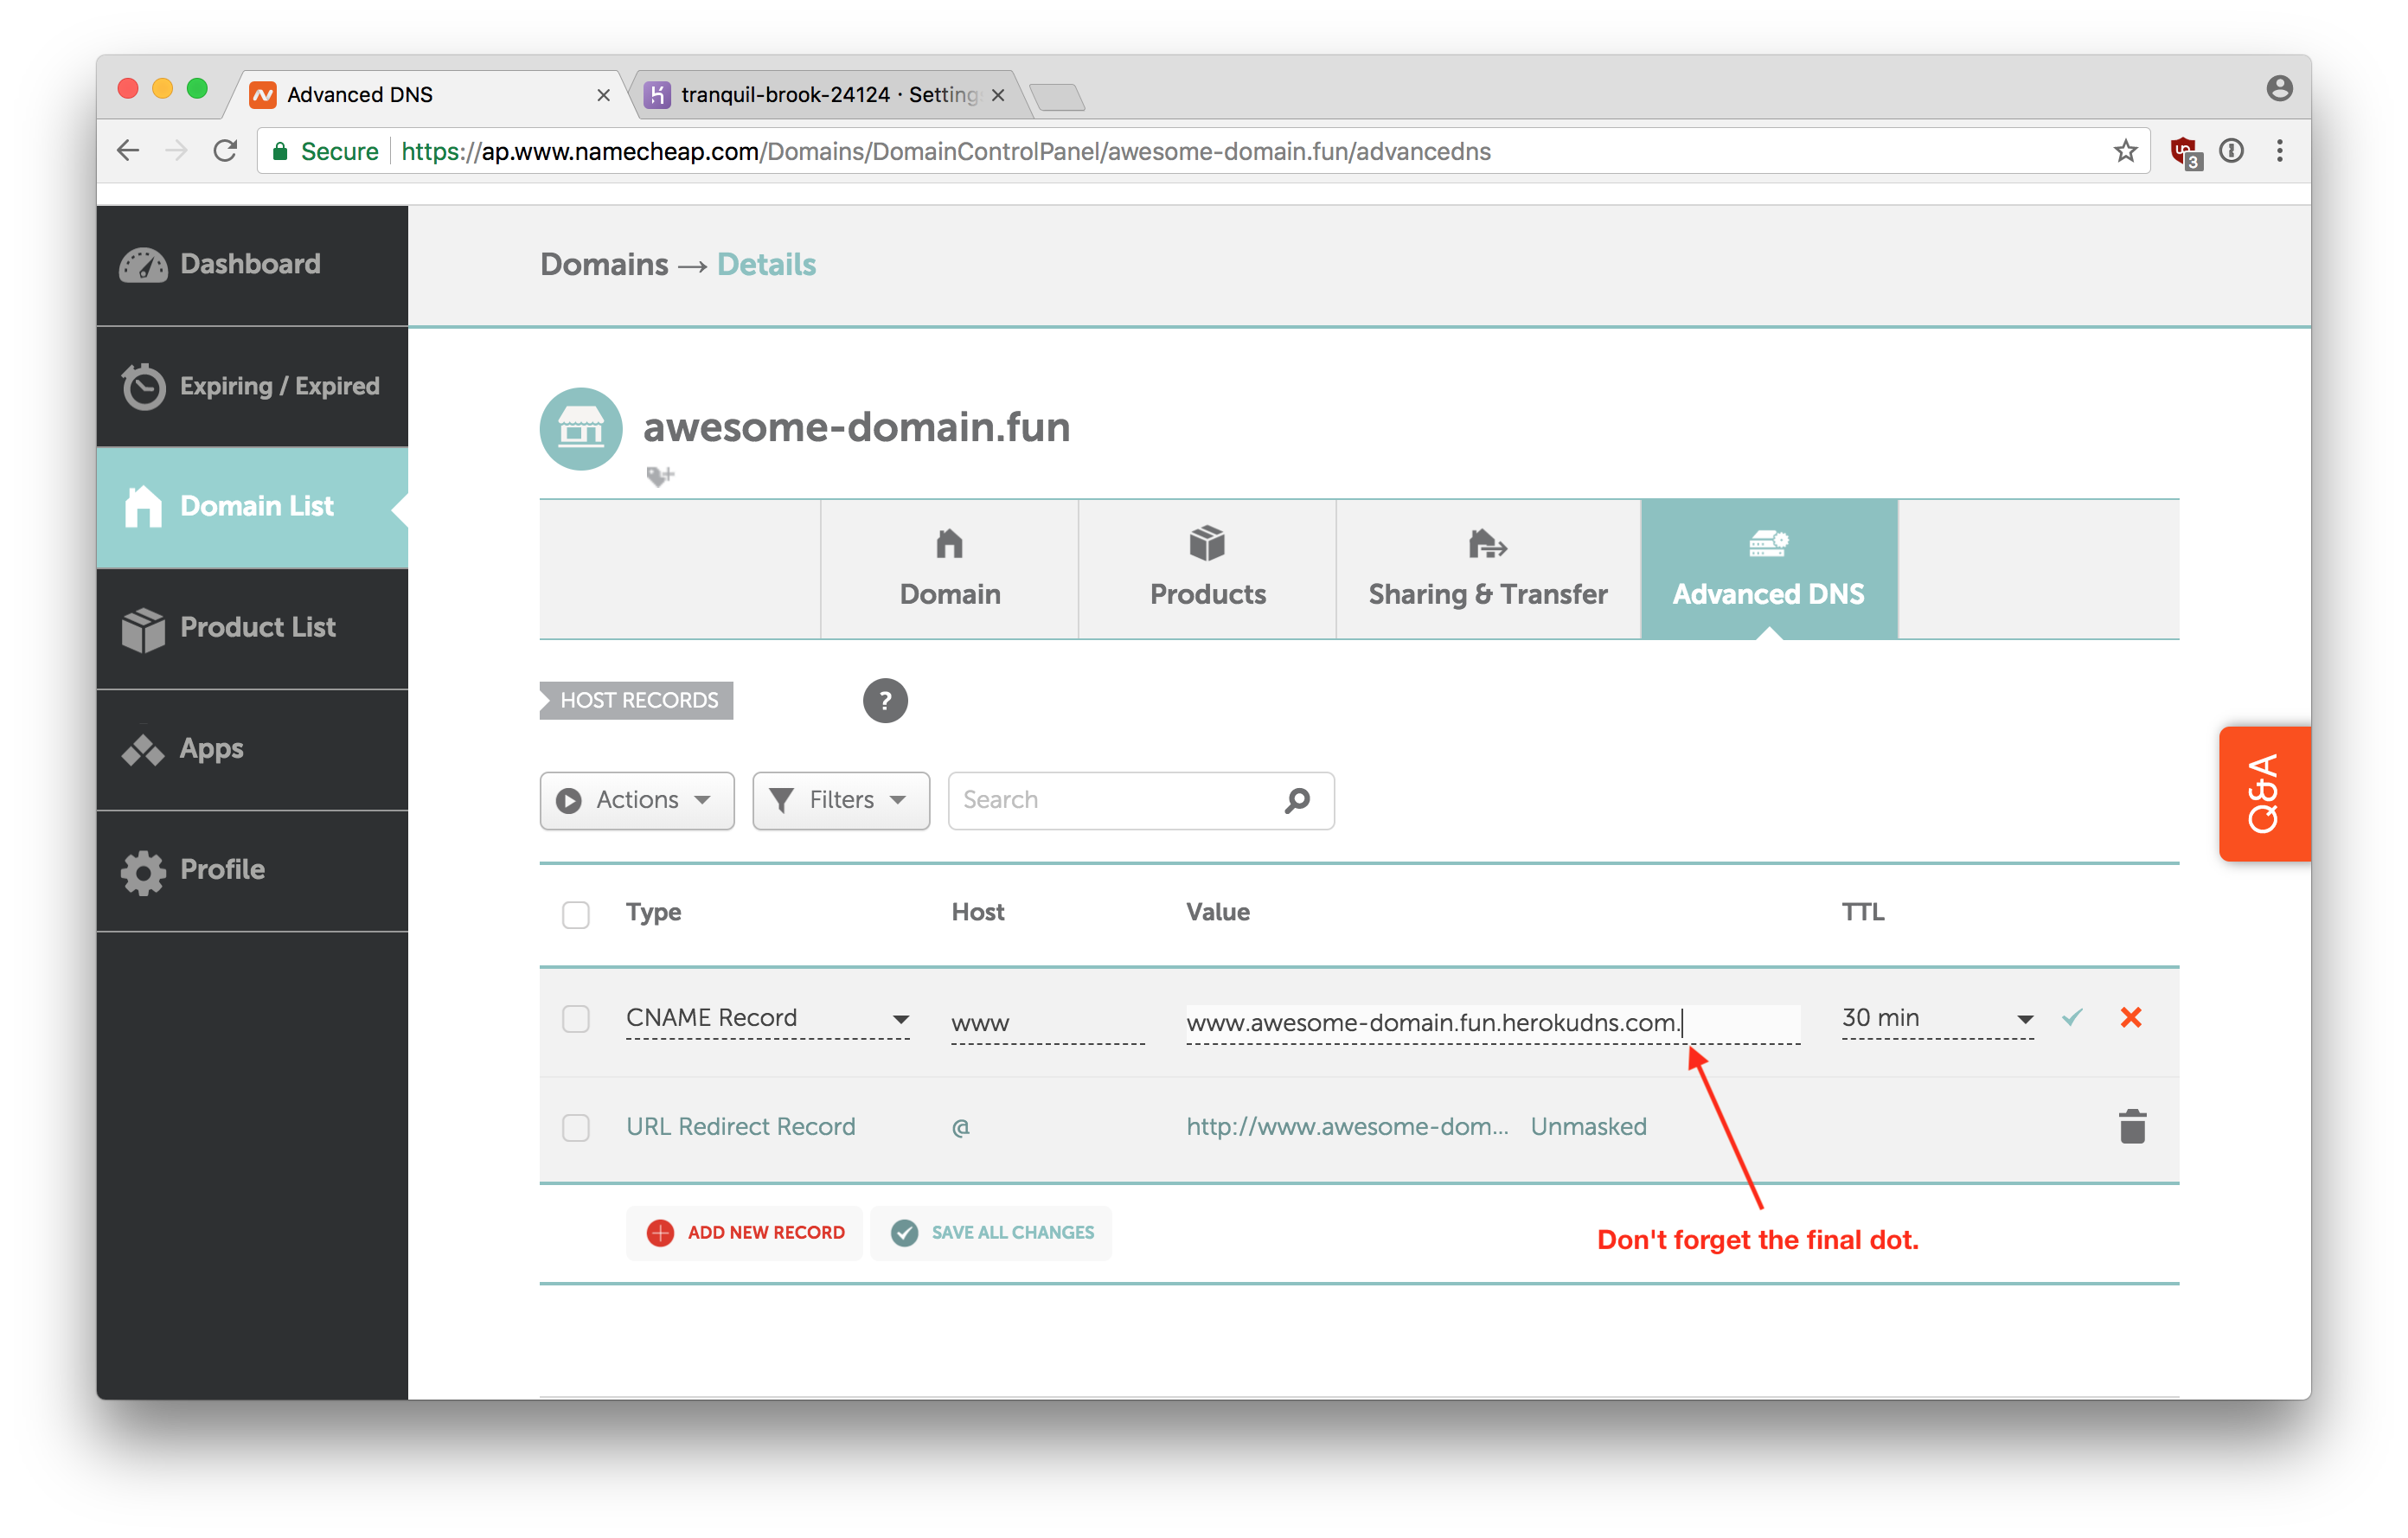
Go back to Namecheap Domain List, click on your domain to manage it. Then go to the Advanced DNS tab. You will find that the www subdomain (what Namecheap has under the column Host) is already assigned to a parking page. We need to edit this record. Click in the Value column to edit and paste what you copied in Heroku. Add a final dot . at the end. Then click on the little green tick icon to confirm.
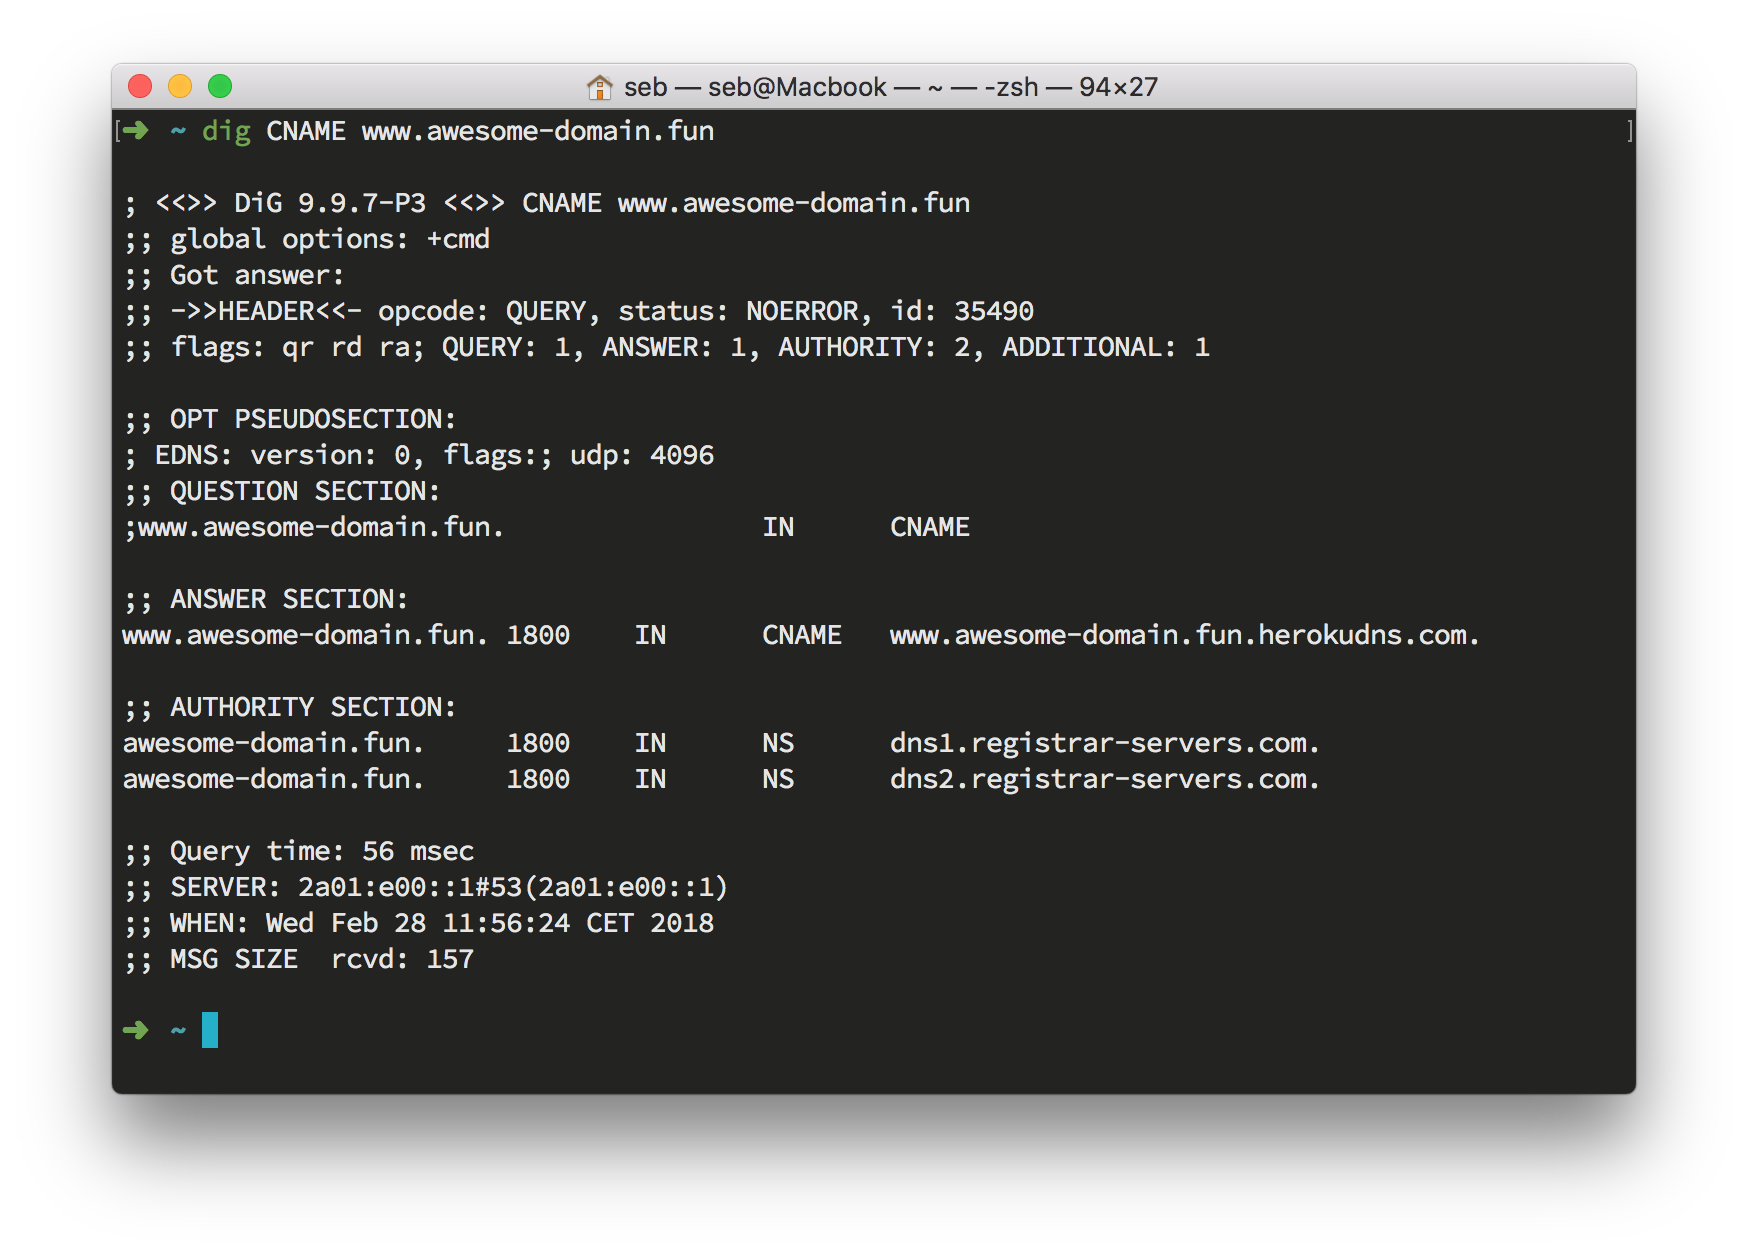
That should be it! To check if this change has propagated to your local DNS server, you can use the dig command with:
dig CNAME www.yourdomain.tld
You can see in the screenshot above that www.awesome-domain.fun is pointing with a CNAME to www.awesome-domain.fun.herokudns.com. We are all good! You can open your favorite browser and go to http://yourdomain.tld to check the result
Bonus - Redirect an email address
It may be useful to have an email like contact@yourdomain.tld. With Namecheap, you can set up an email redirection to go straight to your personal inbox.
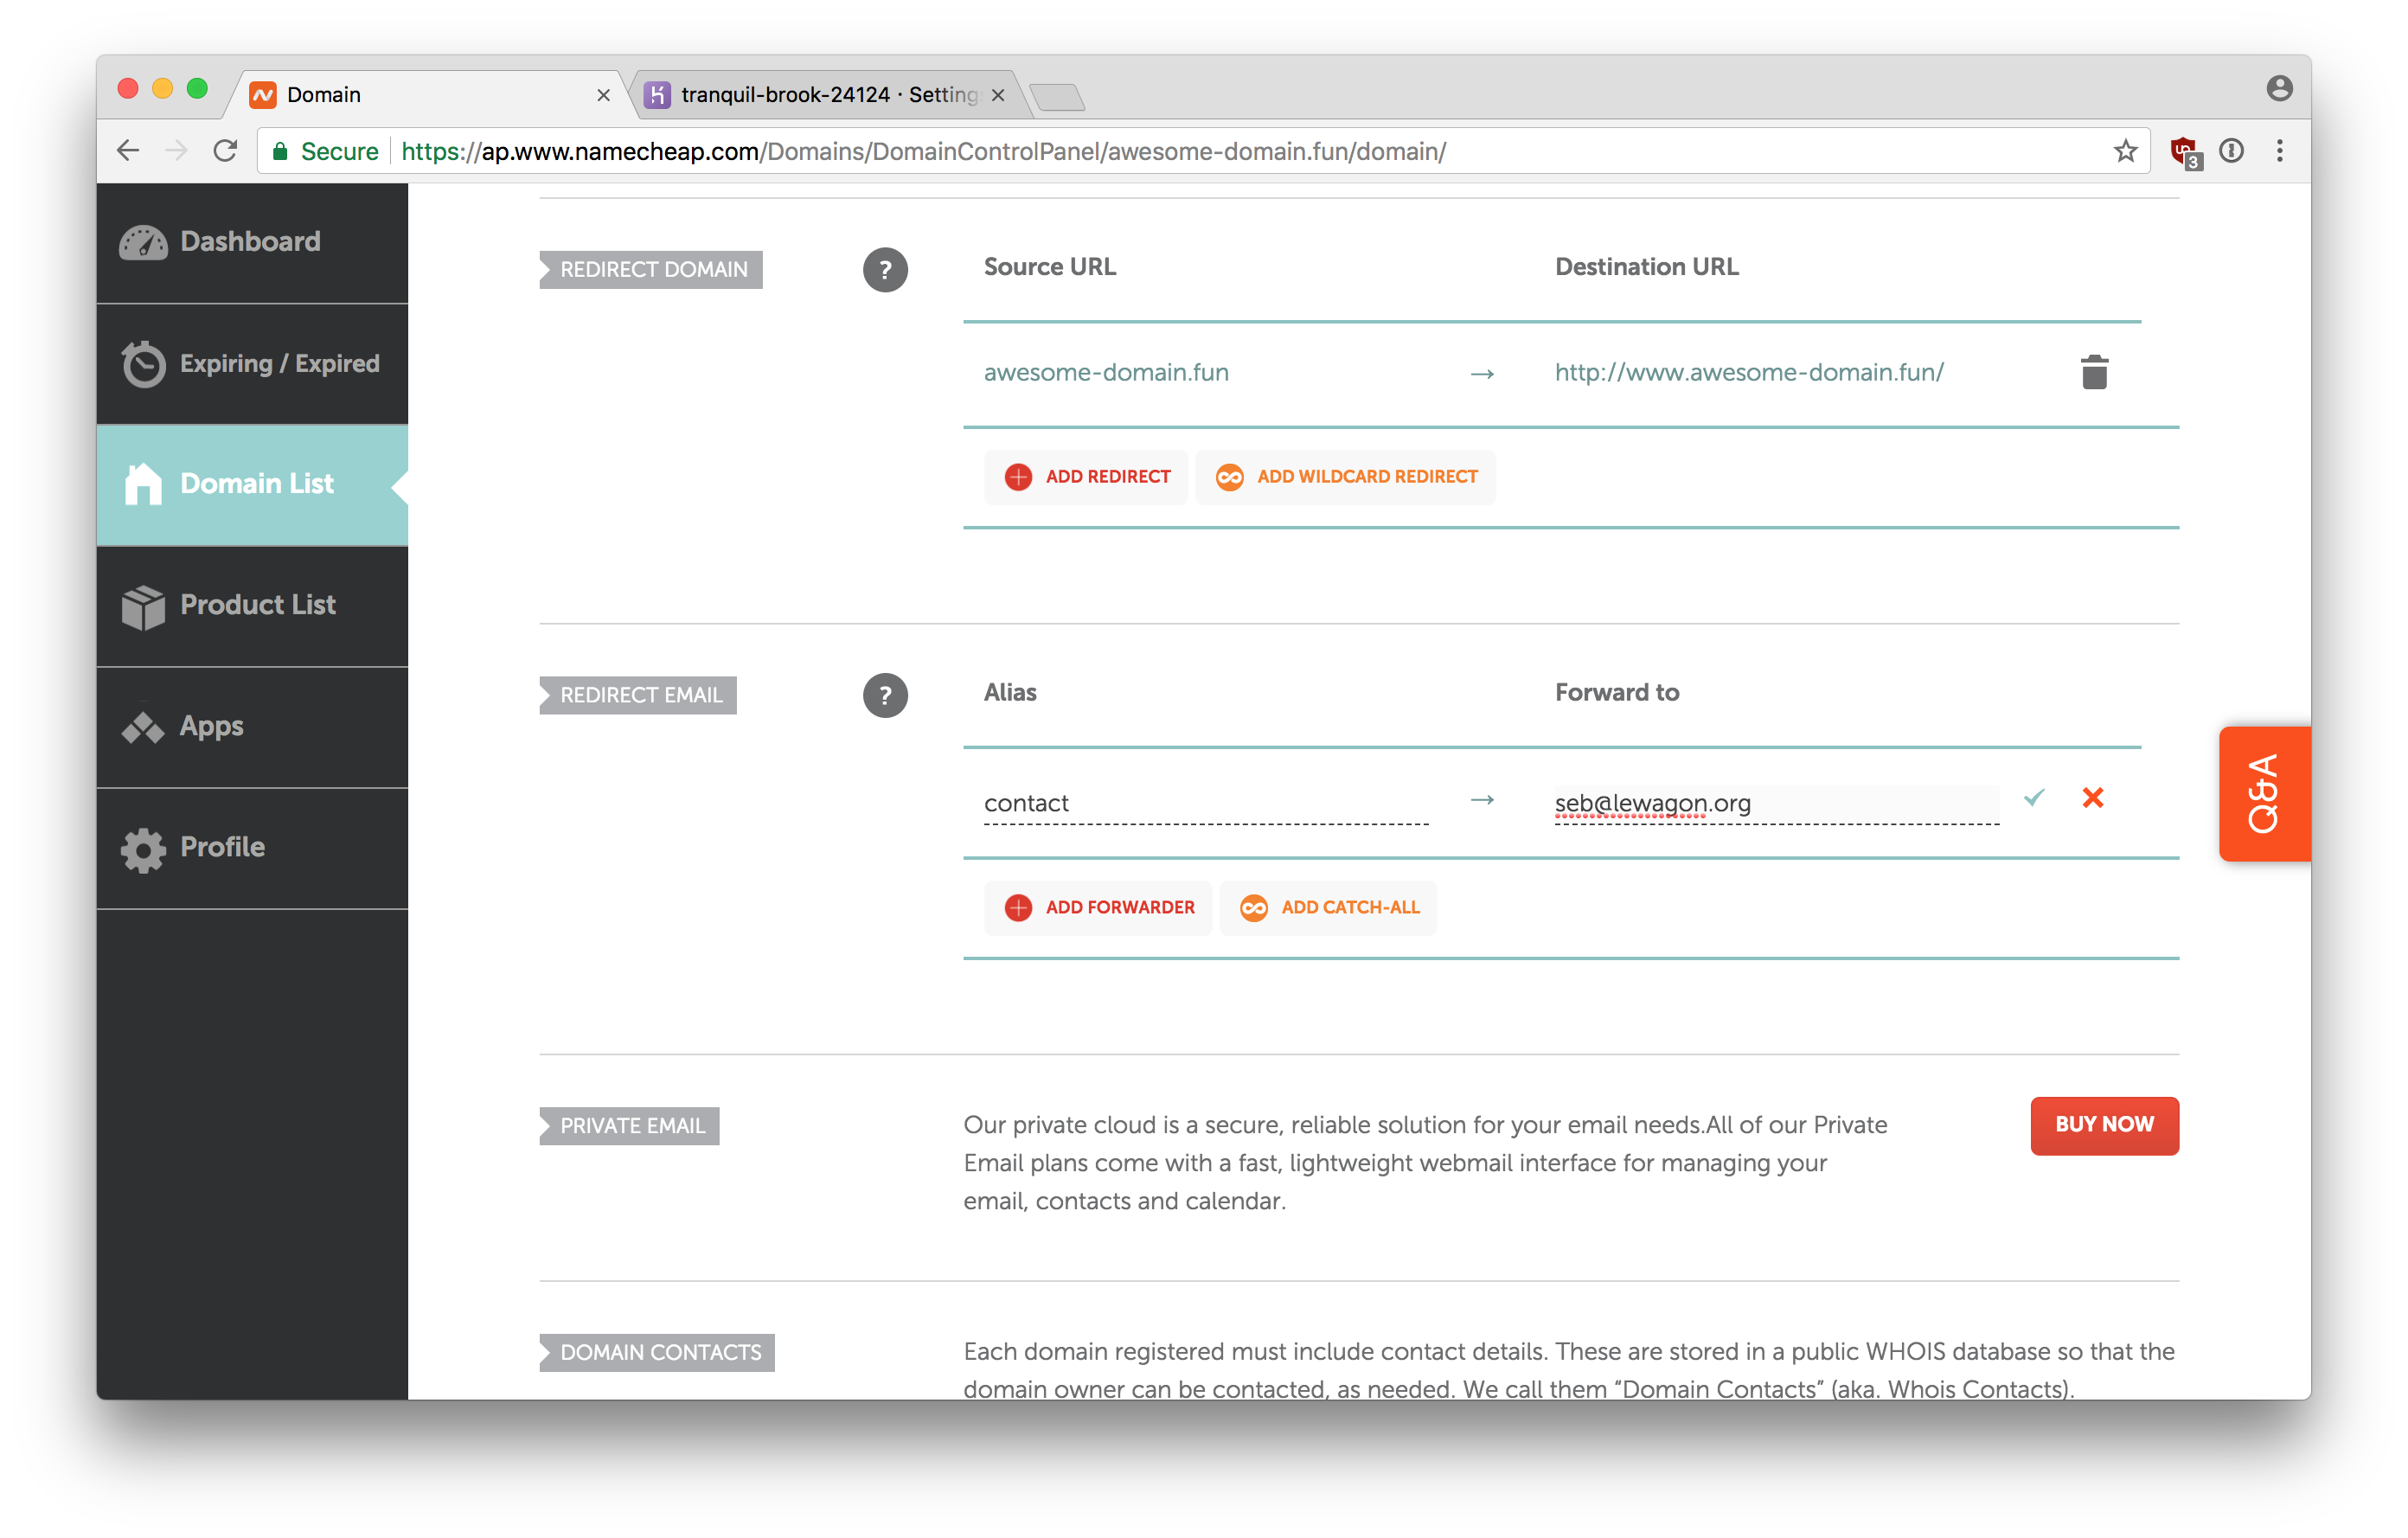
Go to the Domain tab, and scroll down until you reach the Redirect Email section. Click on the Add Forwarder button, specify the forwarder (without the @yourdomain.tld) and your personal email. Confirm by clicking on the green tick icon.
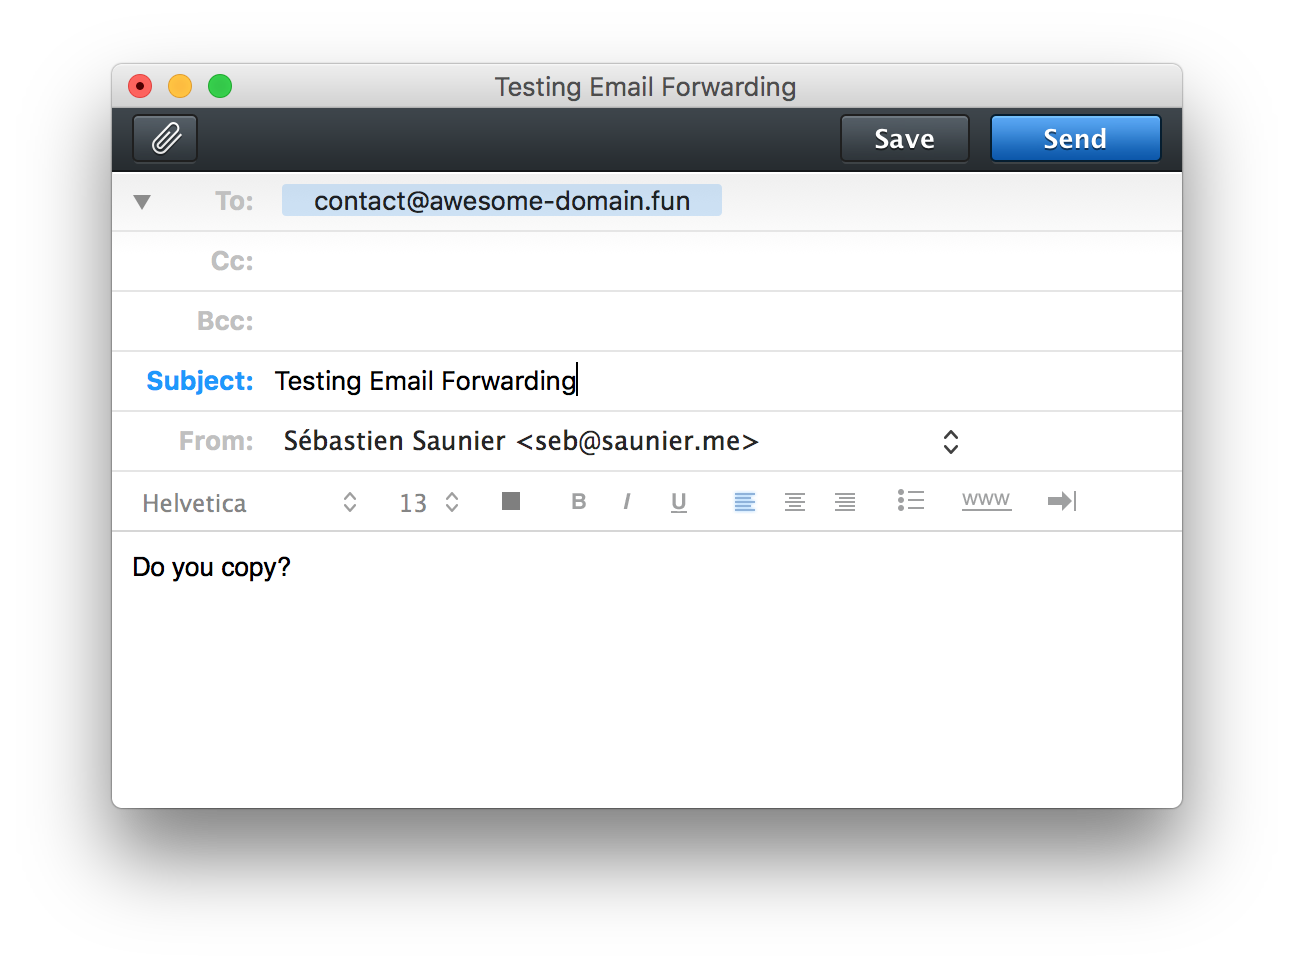
That's it! Ask someone on your team to send an email to contact@yourdomain.tld:
You should receive it instantaneously .
What next?
If you want your website to use a https:// scheme, read on!
Our users have also consulted:
Meet Dylan: a web consultant who decided to specialize in web development
As a web consultant, Dylan used to work in various fields, from marketing to web